
Table of Contents
- How Do You Clean a Washing Machine Drain Filter? (Quick Answer)
- Signs Your Drain Filter Needs Cleaning
- What Actually Clogs a Drain Filter
- Safety Precautions Before You Start
- Related Error Codes Caused by a Clogged Filter
- Where to Find Your Filter (By Machine Type)
- Where to Find Your Owner’s Manual
- DIY Tutorial: Step-by-Step Filter Cleaning
- If the Filter Is Clean and You’re Still Not Draining
- Recommended Cleaning Frequency
- Warranty Considerations
- Preventing Future Clogs
- FAQs
- Conclusion & Next Steps
How Do You Clean a Washing Machine Drain Filter? (Quick Answer)
To clean a washing machine’s drain filter, unplug the machine, place towels and a shallow container beneath the small access panel at the bottom front, open the panel, drain any residual water through the emergency drain tube, then turn the filter counterclockwise to remove it, rinse out the debris, and reinstall it clockwise until snug. The whole process takes about 15–20 minutes and is the single most effective fix for a washer that won’t drain or leaves clothes soaking wet.
Signs Your Drain Filter Needs Cleaning
A clogged drain filter has a few unmistakable tells:
- Clothes come out of the wash cycle soaking wet instead of just damp.
- Standing water remains in the drum at the end of a cycle.
- The wash or drain cycle takes noticeably longer than usual.
- The machine seems to strain, hum loudly, or vibrate excessively during the drain or spin phase.
- A musty or rotten-egg smell develops around the machine, caused by trapped water and debris.
- A drain-related error code appears on the display (see the code list below).
What Actually Clogs a Drain Filter
The drain filter’s whole job is to protect the pump by catching anything that shouldn’t go through it, which means it accumulates:
- Lint and fabric fibers — the most common buildup, especially from towels, blankets, and pet bedding.
- Coins, buttons, and hairpins left in pockets.
- Hair and pet fur, which can wind tightly around the filter’s impeller hub.
- Detergent and fabric softener residue, which cakes onto the filter and housing over time, especially with excess dosing.
- Small clothing items like socks or baby clothes pulled fully into the drain line.
Safety Precautions Before You Start
- Unplug the washing machine before opening the access panel — never work on this area with the machine powered on.
- Let the machine cool down if it just finished a hot wash; residual water behind the filter can be surprisingly hot.
- Have towels and a shallow container ready — there is almost always standing water behind the filter cap, and more than you’d expect.
- Don’t force a stuck filter cap. If it won’t turn, check for a locking tab or safety knob (common on some models to prevent kids from opening it) rather than applying more force and risking a stripped or cracked cap.
Related Error Codes Caused by a Clogged Filter
A clogged drain filter is one of the most common root causes behind drain-related error codes across brands, though the exact code varies by manufacturer:
- Samsung 5E / 5C — a drainage fault frequently traced back to a clogged filter. See our full guide: Samsung Washing Machine 5E Error.
- LG OE — LG’s drain error code, also commonly resolved by a filter cleaning.
- Whirlpool/Maytag F2/F9 or “Ld”-style codes — model-dependent, but drainage-related codes on these brands point to the same category of cause.
If your machine isn’t showing a specific code but simply isn’t draining, that’s reason enough to start with the filter regardless of brand — it’s the highest-success, lowest-effort fix available. For a full symptom-to-cause breakdown across every brand, see The Complete Washing Machine Troubleshooting Guide.
Where to Find Your Filter (By Machine Type)
Filter location depends heavily on your machine type:
- Front-load washers almost always have a drain pump filter behind a small access door at the bottom front of the machine, often on the bottom right or left corner.
- Older top-load washers (generally pre-2001 or standard agitator models) typically use a removable lint filter — check the top rim of the drum or inside the center agitator column.
- Newer high-efficiency (HE) top-load washers often skip a user-serviceable filter entirely, relying instead on a more powerful pump and a self-cleaning system. If your manual doesn’t mention a filter, your machine likely falls into this category — skip ahead to the prevention section.
- Always confirm against your specific owner’s manual, since access panel design and filter type vary even within the same brand’s lineup.
Where to Find Your Owner’s Manual
Your model number, usually printed on a sticker inside the door frame or on the back panel, determines the exact filter location, access panel design, and whether your machine has a user-serviceable filter at all. Manufacturer support sites host manuals and model-specific video walkthroughs, which are especially useful here since filter access differs noticeably between brands and even between product generations from the same brand.
DIY Tutorial: Step-by-Step Filter Cleaning
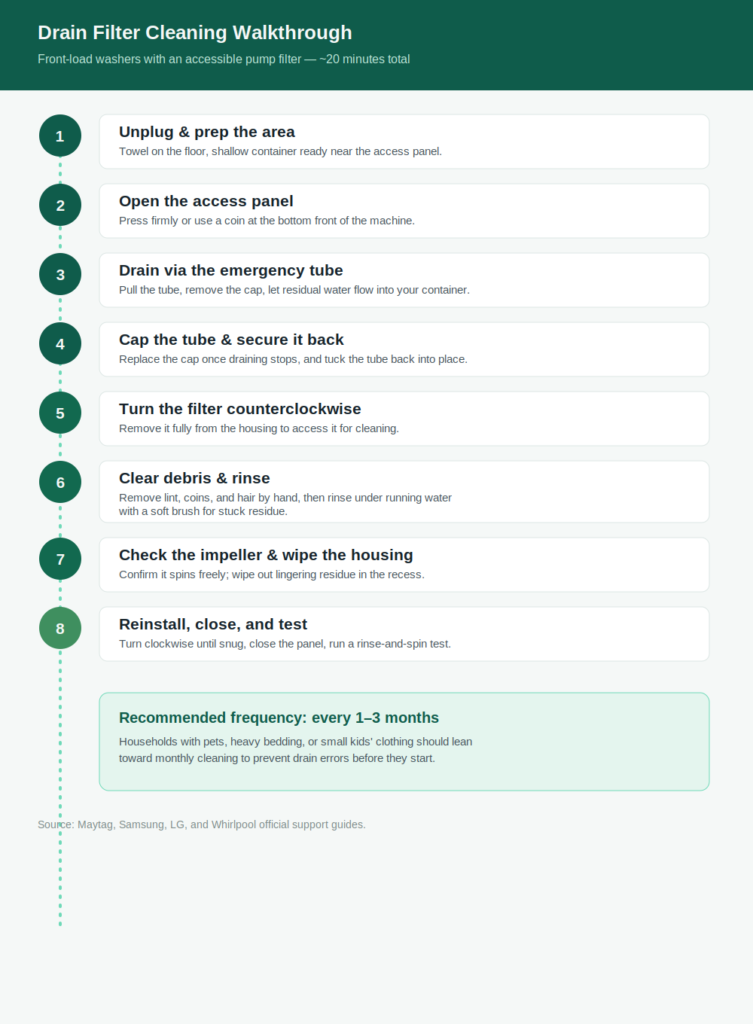
Here’s the complete process for a front-load washer with an accessible drain pump filter, the most common configuration:
- Unplug the washing machine from the wall outlet.
- Place a towel on the floor in front of the access panel, and set a shallow container nearby.
- Open the small access door at the bottom front of the machine — press firmly or use a coin, depending on your model.
- Locate the emergency drain tube inside, pull it out gently, and remove its cap.
- Let the water drain into your container until it stops flowing; keep a second container handy for a full tub, since this can be more water than you’d expect.
- Once drained, replace the cap and secure the emergency drain tube back into position.
- Turn the drain filter counterclockwise to remove it fully from the housing.
- Remove all debris by hand first — lint, coins, hair, buttons — then rinse the filter under running water.
- Use a soft brush to clear any residue from the filter threads and check that the pump impeller (visible through the filter opening) spins freely and isn’t jammed or wrapped in hair or thread.
- Wipe out the filter housing/recess with a damp cloth to remove lingering residue before reinstalling.
- Reinsert the filter and turn it clockwise until it’s snug and seated — don’t overtighten a plastic cap.
- Close the access panel and run a short rinse-and-spin cycle with no laundry to confirm normal drainage.
If the Filter Is Clean and You’re Still Not Draining
If you’ve cleaned the filter thoroughly and the machine still won’t drain properly:
- Check the external drain hose for kinks, clogs, or incorrect height, following the same checks covered in our The Complete Washing Machine Troubleshooting Guide.
- Inspect the pump impeller more closely for anything wrapped tightly around the hub that a rinse alone won’t dislodge.
- Consider a failed drain pump. If the filter, hose, and impeller are all clear and the machine still won’t drain, the pump motor itself may need testing or replacement — see How to Replace a Washing Machine Drain Pump for the full walkthrough.
Recommended Cleaning Frequency
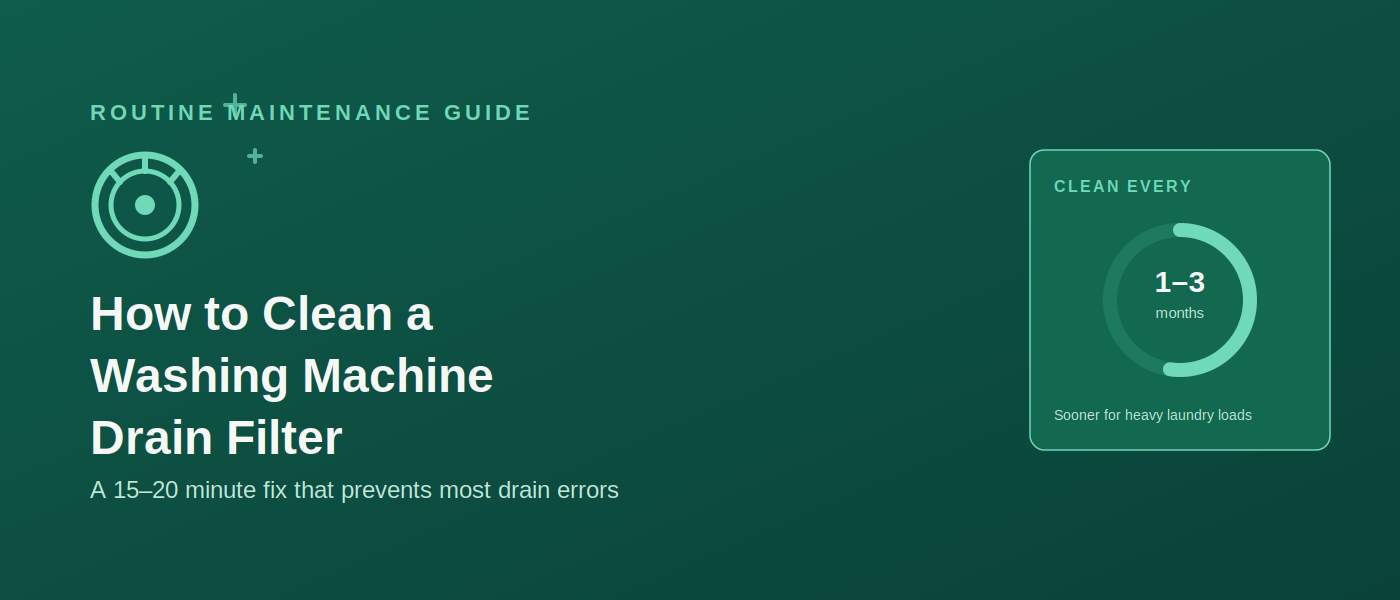
Most manufacturers recommend cleaning the drain filter every one to three months under normal use. Households that wash heavy bedding, pet items, or small children’s clothing frequently — all common sources of debris — should lean toward monthly cleaning, while lighter-use households can often stretch to every three months without issue. If you notice any of the warning signs above before your next scheduled cleaning, don’t wait for the calendar — clean it as soon as symptoms appear.
Warranty Considerations
Cleaning the drain filter is standard, manufacturer-recommended homeowner maintenance and does not affect warranty coverage on any brand — in fact, most manufacturers explicitly document this process in their support materials as something owners are expected to do themselves. If cleaning reveals a damaged filter, cracked housing, or a pump that needs replacement while your machine is still under warranty, check your warranty terms before replacing components yourself, since component-level repairs may need to go through an authorized technician to stay covered.
Preventing Future Clogs
- Empty every pocket before starting a load — this single habit prevents a large share of coin- and button-related clogs.
- Use a mesh laundry bag for small items like socks, baby clothes, and delicates that are prone to slipping into the drain line.
- Avoid overdosing detergent and fabric softener; excess product is a major contributor to sludge buildup in the filter and housing.
- Run an empty hot-water maintenance cycle monthly, ideally with a washer-safe cleaner, to help reduce residue buildup between filter cleanings.
- Stick to the recommended cleaning schedule above rather than waiting for symptoms to appear.
FAQs
How do I know if my washing machine even has a drain filter? Check your owner’s manual first. Front-load washers almost always have one behind a small access panel at the bottom front. Many newer high-efficiency top-load washers skip a user-serviceable filter entirely in favor of a stronger pump and self-cleaning system.
Is it normal for a lot of water to come out when I open the filter? Yes. There is almost always standing water behind the filter cap, sometimes more than a full container’s worth, which is why draining through the emergency tube first and having towels ready is an essential step, not an optional one.
Can I run the washer with a dirty or clogged filter? You can, but it puts unnecessary strain on the pump, slows draining, and increases the odds of a drain-related error code or standing water at the end of a cycle. It’s a quick enough fix that there’s little reason to put it off once you notice symptoms.
Why does my washer smell bad even after I clean the filter? A clean filter resolves debris-related odors, but persistent smells can also come from the door gasket, detergent drawer, or the outer tub. If odor continues after a spotless filter, check and clean those areas separately.
What if the filter won’t turn to unscrew? Check for a small locking tab or child-safety knob before applying more force — some models include one specifically to prevent accidental opening. Forcing a stuck cap risks stripping or cracking it.
Do top-load washers need this same maintenance? Older standard top-load washers with a removable lint filter benefit from similar periodic cleaning. Most high-efficiency top-load washers made after the early 2000s don’t have a user-serviceable filter at all and rely on their pump design instead — check your manual to confirm which type you have.
Conclusion & Next Steps
A clogged drain filter is, by a wide margin, the most common reason a washing machine won’t drain properly — and it’s also one of the easiest problems on this entire site to fix yourself, with no tools beyond a towel, a container, and about twenty minutes. Make it a habit every one to three months and you’ll avoid the majority of drain-related error codes and soggy-laundry frustrations before they start.
If cleaning the filter doesn’t fully resolve the issue, don’t keep guessing — check out The Complete Washing Machine Troubleshooting Guide to work through the rest of the drainage checklist, or head straight to How to Replace a Washing Machine Drain Pump if you suspect the pump itself has failed.